
You’re thinking about creating an app for your business, congrats!
Before jumping right in, there are a few steps to take when creating an app that you must take to ensure a smooth process and a good user experience.
Identify Why You Would Need an App
First let’s ask the question: Do you need an app?
There are typically two reasons why you would need an app: one is if you have a new mobile-specific app idea (such as Angry Birds or Snapchat). The other is to extend your current business to your users fingertips for more accessibility (such as Target’s mobile shopping app).
Once you’ve determined if an app is necessary and useful, here are 10 steps to get started.
- Gather all brand assets
- Solidify your logo and variations
- Select your color and typeface
- Choose color hierarchy
- Create graphics and visuals
- Ideation and wire-framing UX/UI designs
- Lo/Hi-fidelity Mockups
- Prototyping
- Iterate and test your design with users
- Hand off to development team
Gather All Brand Assets
Before getting too far, the first steps when creating an app is to do your market research and understand what sort of relationship you want to have with your customers.
Your brand assets will help convey emotions, memories, and connections with your customers. These assets are broken down into more detail below.
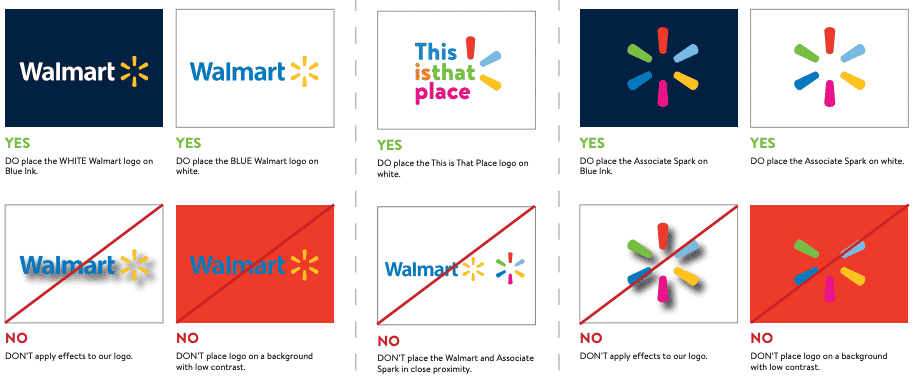
Solidify Your Logo and Variations
Here are examples of correct and incorrect usages for the Walmart logo. These standards are determined by the marketing team or brand developer.
It is important to have these rules established prior to handing your brand off to anyone that may not know your brand as well as you do.
Choose color hierarchy
Walmart has five colors in their brand palette. This visual shows the color hierarchy to be used when designing assets for your brand. The navy blue is most heavily used, supported by white, royal blue, and supported by light uses of yellow or pink.

Create graphics and visuals
When designing the branding for your app, you need to have strong graphics and visuals. These can be in the form of photographs or digital illustrations. There is no right or wrong answer when deciding between the two, it just depends on what kind of vibe and emotion you want to create for your users.
Photographs are great for captivating real-life energy, emotion, and relatable moments. They can provide authenticity.
Digital graphics and illustrations can be used for a more timeless style that is fun, playful, and communicates abstract concepts more easily than a photo.
In either case, you can decide how heavily you want to rely on one or the other, or a mixture of both.
Now that you have your branding understood, we can begin working on the ideation process for the app functions and features.
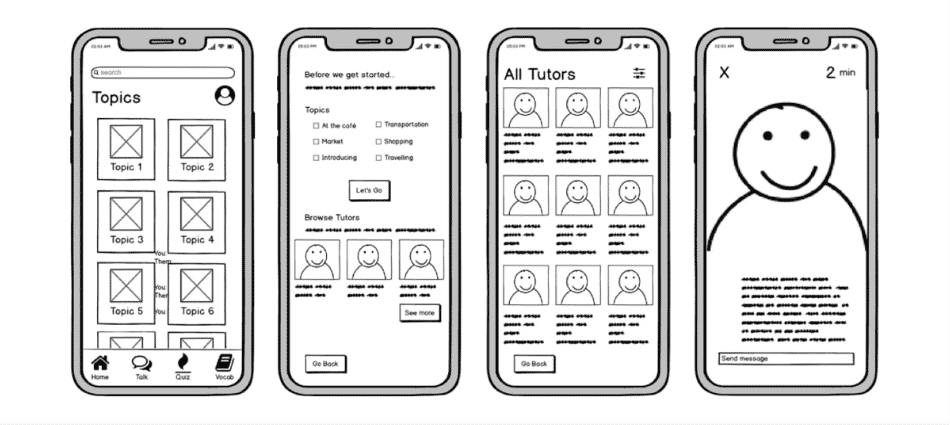
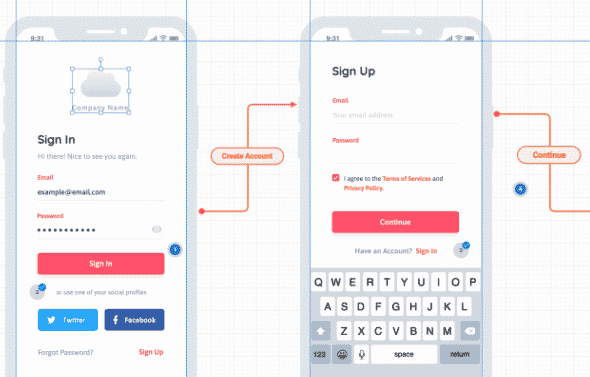
Ideation and wire-framing
Now we get into the UX/UI steps of creating your app.
Start by grabbing a paper and pencil to sketch out how you want your app to look. What functions will there be, what buttons, what menu items, how will the page layouts be designed, etc?
Once you have some ideas sketched out that you like, create a more organized digital wireframe. This is a very simple mockup of your app.
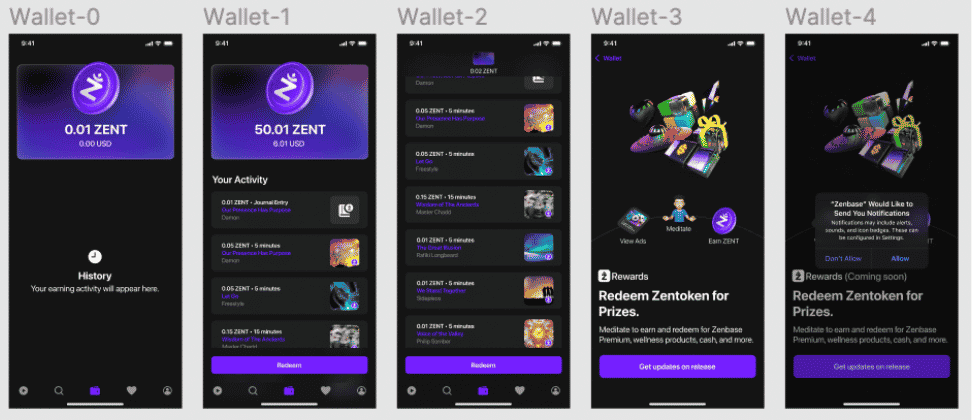
Lo/Hi-fidelity Mockups
Next, you can create some Lo-fi mockups that begin to look more like an app. Figma is a great resource for this (especially when you get to the Hi-fi mockups). It will not include any of your branding yet, but will include all the basic pages and elements to your app.
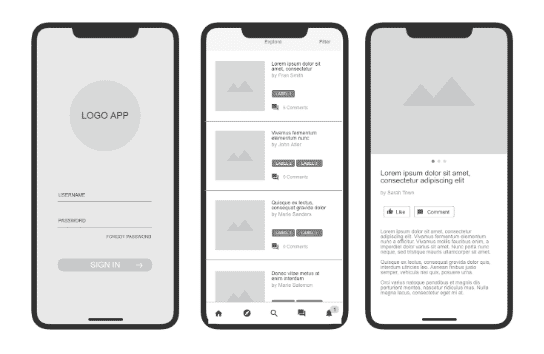
Once that is secured, you can move on to Hi-fi mockups. These are essentially the final design for your app without yet being a functional app. Hi-fi mocks will include all your branding, pages, CTAs, etc. But hang tight, there are a few more steps!
Prototyping
Now we are going to actually go through the functions of the app. How will users get from one page to the next?
The prototyping phase allows you to think through potential complications before they become a big headache.
Iterate and test your design with users
You’re almost there! If you only remember one step from this whole list—it should be this one.
Testing your designs with users will either validate your work or unveil some kinks in the design that need to be resolved.
Set up 1:1 tests with friends, family, or community members to see what their user-experience is like.
Hand off to development team
Now you’ve done all the prep work! Once your final designs are approved, you can start building.
The last step is to hand off your designs and prototypes to a development team who can create the real version of the app for you.
After that’s done, submit your app to the app store and share the news with your audience that it’s ready for use!
Ready to start designing your own app? You can learn more about steps when creating an app by watching our full workshop or downloading this guide. For more information on the services we offer at RevRoad, visit us at our website.


No comment yet, add your voice below!